Orange Pi 5 First Steps

So you got an Orange Pi 5 and aren't quite sure where to begin? Or you are looking for a great single-board computer (SBC) to play with? Maybe you want to know how to set one up after reading one of my other posts. Great. Let's set it up and start playing around with it!
Why Orange Pi 5?
It is an awesome single-board computer powered by a Rockchip RK3588S system-on-chip (SoC) that has a big.LITTLE architecture with a quad-core ARM Cortex-A76 and quad-core Cortex-A55 CPU, Mali-G610 MP4 GPU, support for up to 32 GB of LPDDR4x/LPDDR5 RAM, and a built-in NPU for accelerating AI and machine learning tasks. Depending on the version you get, you can get an assortment of connectivity options including Wi-Fi, Bluetooth, NVMe, eMMC, Gigabit Ethernet, HDMI, and USB ports. It's also low power and not incredibly expensive, so it is a great SBC to play around with without making a huge investment. I have the 16GB versions of an Orange Pi 5 and Orange Pi 5 Plus.
Flash an SD Card
The first step is to flash a suitable Linux distribution onto an SD card. Orange Pi provides several Linux flavors you can download from them or you can grab a copy of Armbian. I'm a big fan of Debian Linux and like the community built up around Armbian, so I went that route. Depending on your skill level you can use dd or something like balenaEtcher to with the .img to the SD card. Armbian has a nice writeup on how to do just this if you're not familiar with the process.
That's pretty much it, pop the sucker into the SD card slot of your Orange Pi, boot it up, and go do nerdy things.
Ditch the SD Card
Running off of an SD card works but is less than ideal. They are pretty slow and notoriously unreliable in the long term. One of the reasons I bought an Orange Pi 5 is because it has a built-in NVMe slot, so I'll show you how I set that up too… well, I'll show you how you can do it the easy way and how I actually set up my machine.
The Easy Way
If you just want to install to another device, it is easy enough. Download the .img you want to use and write to that drive using dd. Then install the boot loader to the SPI flash on your Orange Pi 5 so you can still boot without an SD card in.
1) Download the image you want to use:
curl --location https://dl.armbian.com/orangepi5/archive/Armbian_24.2.1_Orangepi5_bookworm_legacy_5.10.160.img.xz | xz -dv > armbian.img2) Copy the image to your NVMe drive (or you can use the eMMC if you're using an Orange Pi 5 Plus):
dd if=armbian.img of=/dev/nvme0n1 bs=1M status=progress3) Install the boot loader on the SPI flash. This can take a few minutes so be patient:
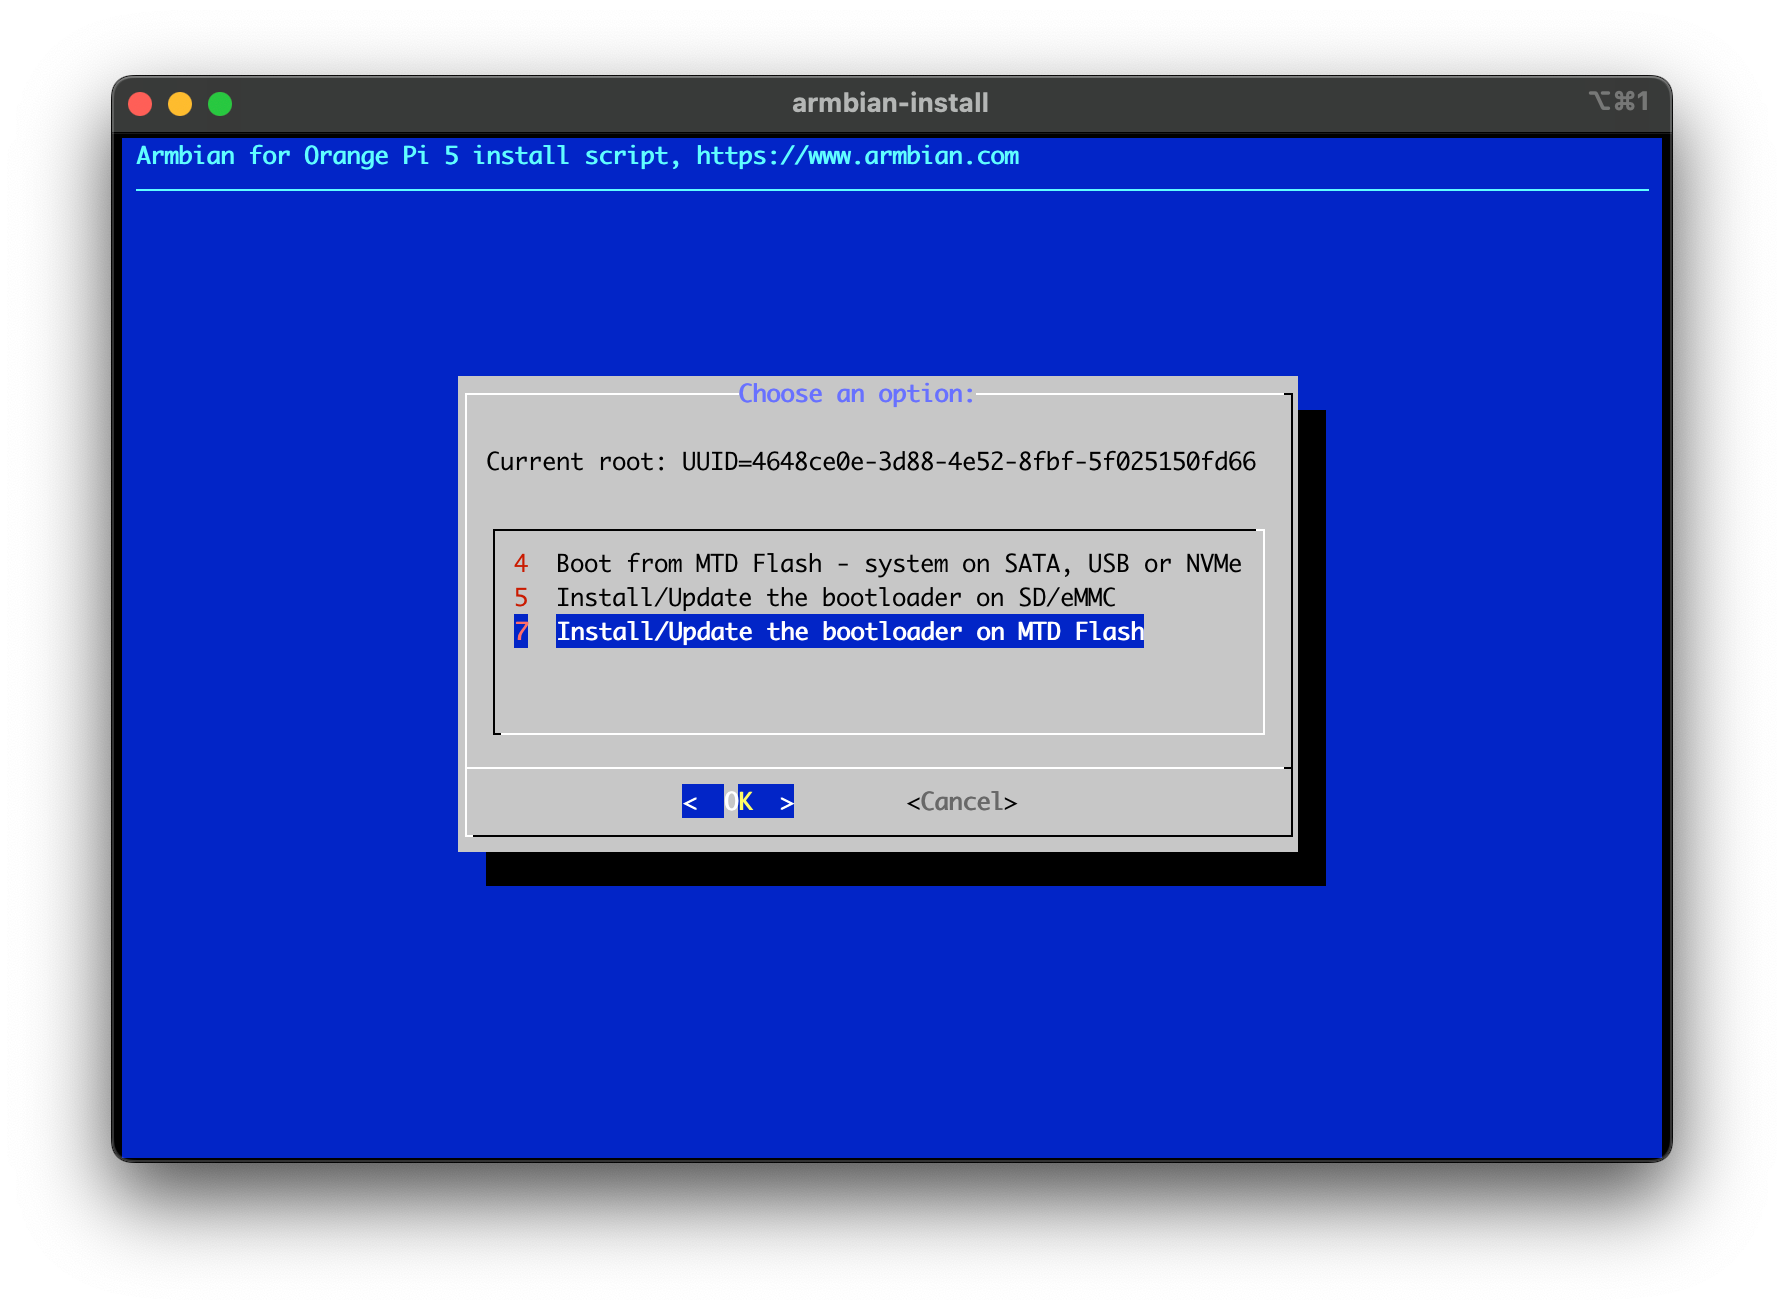
armbian-install
4) Once it is done, you can power off the machine, eject the SD card, and boot back up. You are now running a fresh instance off your internal drive. All done!
The Hard Way
I'm not writing this blog because I like to take the easy way. I like to overcomplicate things and unnecessarily tinker to make things "just right" for me. For this, that meant jumping through a lot of hoops because I wanted to use btrfs for my root drive. It is my go-to file system if I'm not using ZFS. It provides checksumming, subvolumes instead of partitions, the ability to send/receive filesystems, and snapshots. I'm hopeful soon I'll feel comfortable throwing bachefs into that mix too, but for now, I'm sticking with btrfs.
1) Download the image you want to use:
curl --location https://dl.armbian.com/orangepi5/archive/Armbian_24.2.1_Orangepi5_bookworm_legacy_5.10.160.img.xz | xz -dv > armbian.img2) Create a loop device so I can mount the individual partitions of the .img. While I'm at it, I'm going to mount those partitions because I'll need to copy the files from them to our target disks:
LOOPDEV=$(losetup --partscan --find --show ./armbian.img)
mount ${LOOPDEV}p2 --mkdir=0660 /tmp/armbian
mount ${LOOPDEV}p1 --mkdir=0660 /tmp/armbian/boot
3) Prepare the destination. First, I need to install gdisk (and sgdisk) so I can easily partition the drive. This creates a 2GB boot disk and will use the rest for the root disk:
apt update && apt install -y gdisk
sgdisk --clear --new=0:0:+2G --change-name=0:BOOT --typecode=0:ef00 --new=0:0:0 --change-name=0:microbox_root --typecode=0:8300 --print /dev/nvme0n1
4) Format the disk with filesystems:
mkfs.vfat -n BOOT /dev/nvme0n1p1
mkfs.btrfs -f -L microbox_root /dev/nvme0n1p2
5) btrfs goodness… subvolumes! Create a subvolume for / and /home and then mount them. You can see I'm mounting @root and @home with different compression levels since I am willing to spend more CPU cycles to compress stuff that changes less and I don't access very frequently:
mount LABEL=microbox_root --mkdir=0660 /tmp/microbox
btrfs subvolume create /tmp/microbox/@root
btrfs subvolume create /tmp/microbox/@home
umount /tmp/microbox

mount LABEL=microbox_root -osubvol=@root,defaults,compress=zstd:15 --mkdir=0660 /tmp/microbox
mount LABEL=BOOT --mkdir=0660 /tmp/microbox/boot
mount LABEL=microbox_root -osubvol=@home,defaults,compress=zstd --mkdir=0660 /tmp/microbox/home
6) Copy all the files:
rsync -axHAWXS --numeric-ids --info=progress2 /tmp/armbian/* /tmp/microbox/7) Update the Armbian boot environment so it knows what disks to use when booting:
# get the UUID for my root drive
ROOTDEV=$(blkid --output export /dev/nvme0n1p2 | grep -P '^UUID=')

# replace the existing UUID with the new UUID
sed -i "s/UUID=.*/$ROOTDEV/" /tmp/microbox/boot/armbianEnv.txt

# replace ext4 with btrfs
sed -i "s/ext4/btrfs/" /tmp/microbox/boot/armbianEnv.txt

# add the extra flags to specify the subvolume to use
echo 'extraargs=rootflags=subvol=@root' >> /tmp/microbox/boot/armbianEnv.txt
8) Update /etc/fstab on our destination disk to mount everything as we want:
cat > /tmp/microbox/etc/fstab <<EOF
LABEL=microbox_root / btrfs subvol=@root,defaults,compress=zstd:15 0 1
LABEL=microbox_root /home btrfs subvol=@home,defaults,compress=zstd 0 1
LABEL=BOOT /boot vfat defaults 0 2
tmpfs /tmp tmpfs defaults,nosuid 0 0
EOF
9) Install the boot loader on the SPI flash. This can take a few minutes so be patient:
armbian-install
10) Once it is done, you can power off the machine, eject the SD card, and boot back up. You are now running a fresh instance off your internal drive. All done!
